(a continuation from the previous blog post on Rebuilding An Arcade Game)
With the cab repainted, everything completely cleaned, and the control panel rebuilt, there were only a few things left to do! First, the marquee lighting wasn’t working, so I replaced the fluorescent bulb. That didn’t work so next I swapped out the old FS-2 starter with a new one. That did it.
Then I ordered a very nice 19″ LCD monitor to replace my screen burned CRT. The LCD is incredibly light compared to the CRT, and didn’t take much to hang (I just cut 2 pieces of wood to stretch across the cabinet).
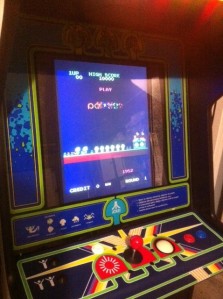
I plugged in the screen to the game’s PCB to make sure things worked. To my delight, it did! It was so incredible seeing Pacman come up on the screen. I knew that no matter what happened from here on out, at least the game would power up!
I wanted the cabinet to really shine so I went online and found the best looking original Centipede marquis and glass screen bezel I could find. They looked better than I could have hoped for (though admitting, cost more than I had hoped too).
Now came the part that took me the longest: wiring. Though I bought a wiring harness online, I needed to strip many of the 40+ wires at both ends. Then, I needed to make sure that all the wires were attached tightly to the inside of the cabinet. If the wires were loose inside, they could cause all sorts of problems.
Wiring up the control panel was very rewarding. Unfortunately, the trackball didn’t work when I wired it up. I couldn’t understand. I rebuilt the entire thing! What was wrong?! I couldn’t find ANYTHING on the internet saying what could be wrong.
I want to be the first one (at least that I’ve seen) to post why an original Atari trackball WILL NOT work with the iCade 60-in-1 PCB: it’s the green PCBs in the trackball. For some reason, they just flat won’t work with the iCade. SO, I had to buy a new Happ red PCB (I realize this is tech-talk, but for anyone else out there who might be rebuilding one of these, I want to relate how to get it done). Once this came in the mail and I wired it up, everything worked great. Get the new red PCBs for the Atari trackball if you’re rebuilding — you can buy it here.
In the process of all this wiring, I’ve learned how to use a soldering iron pretty well! That was cool for me, as I hadn’t had much experience with one before.
The last piece of wiring that I wanted to do was get the power supply for the monitor to plug into the power supply so I’d only have to have 1 power cord coming out the back of the cabinet. A little scary for me considering that I was working with a full 120v. Yikes! After a quick stop at Home Depot, I had all the tools I needed to wire it up. After I double-checked the voltage rating with my new multimeter (another new tool I’ve acquired in the process of rebuilding this game), I plugged in the monitor and……success!
All finished. I closed the back up and switched it on. Everything works flawless & the cabinet looks great! I’m really proud of myself as I’m not one that is usually all that good with this sort of thing. I’ve also ALWAYS wanted to 1) learn how these old games actually worked, and 2) actually own an arcade game! On the downside, my initial $20 investment inflated rather quickly, but I’m glad I did it. What a great 2 weeks for me. I can’t wait to invite the guy who originally sold me the game to come over and play! He’s gonna kick himself. 😉
All in all, I spent around 45 hours on the game. Not bad. Below I’m including a bunch of images of the finished game in my garage. If you’re ever in the area, drop me a line and let’s play it out. I’m getting quite good at Burgertime, Centipede, and Donkey Kong (1, 2, & 3)! Thanks for reading! I’ve really enjoyed sharing the process with you.
With love,
Steven


